

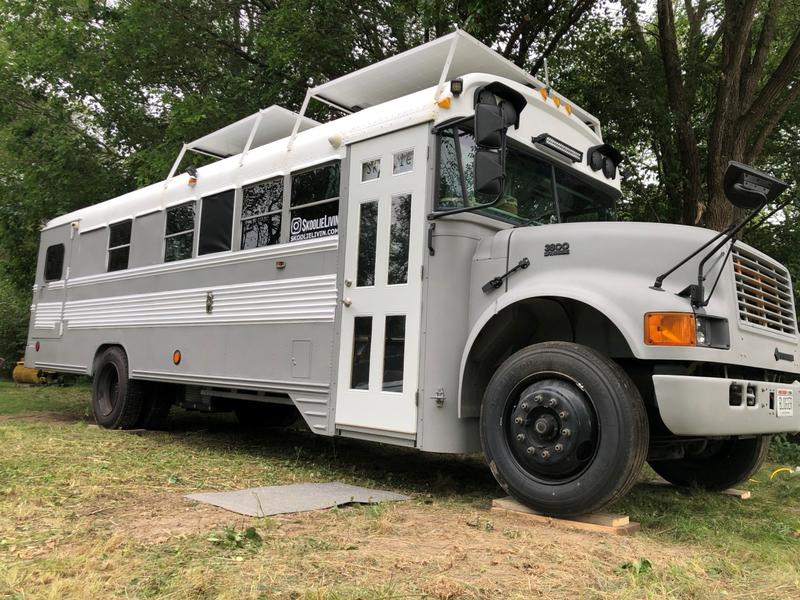
Image Credit: Rupshare / Wikimedia Commons
Who knew that your school bus from your childhood could be converted into a home? Now, typically referred to as a “skoolie,” adventure-goers have turned the hippie “flower power” retired school buses into an entirely new housing option. While today’s school districts are busy figuring out things like school bus fleet management operations and school bus routing, other people are busy converting their old school buses into recreational vehicles, or RVs.
What? and Why?
Of course, some of you might be thinking, “who the heck wants to live in a school bus??” The answer is: many people! Converting a school bus to an RV is very similar to typical RV living - you can drive wherever you want to go and you have your entire house with you - literally! No longer do skoolie owners have to say “darn, I forgot XYZ at home!” because it’s all right there. Adventure lovers who want the maximum amount of freedom (i.e., no standalone house somewhere) can benefit greatly from doing this, as they can travel and live wherever they desire.
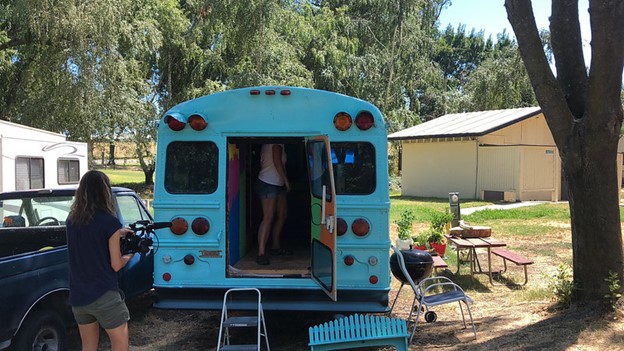
Image credit: Nicolás Boullosa / flickr
It is also worth considering that people who don’t want to travel but also don’t want to rent or buy an actual brick-and-mortar home might want to convert a school bus to an RV to live in. All that is required for this is a good, permanent parking space for the “home” to park in. This also makes it much easier to move, as personal items are already on board! Converting a school bus into a home can definitely get pricey, but it eliminates the need to pay rent or a mortgage, which may be worth it to many people - especially those living in expensive areas.
Since school buses carry precious cargo (i.e., kids), it is required that they be well-made and have heavy-duty construction that can handle harsh conditions. They also come equipped with commercial-grade engines under the hood, and routine school bus fleet maintenance has likely been conducted on them. Therefore, through buying a school bus, you are probably going to get a reliable vehicle to make into your home. This is in stark contrast to many RVs that don’t handle impacts and extreme weather conditions as well as school buses.
You might be wondering if a school bus provides enough space to serve as a home, and the answer is yes! While typical school buses seem cluttered and hard to navigate through, once the seats are removed, they are actually very roomy and spacious. In fact, many people who convert school buses to RVs are able to create several different rooms, just like a small apartment. This is especially useful to those who travel with another person or multiple people, as it allows privacy when needed or wanted.
Converted school buses can even be fitted with kitchen appliances, just like a typical RV, plus they have a plumbing system and a “living room” with televisions and other electronics. People with families can even do well in converted school buses, as there is room for multiple beds. Skoolies are basically what their owners make them - there is no set standard on layout or design, which makes them even more fun and customizable.
Perhaps one of the most attractive aspects of a school bus to RV conversion is the fact that you can literally make it into whatever you want. The interior designing is left up to you and you can decide what goes where as well as change it anytime you feel like it. This gives you the freedom to make your home look exactly like you want it, and if something needs to be changed, it normally isn’t as much of a dilemma as updating a brick-and-mortar residence.
If you want, you can even pretend your phone’s maps app is like high-tech school bus GPS routing technology. If this sounds like your kind of thing, browse online to find skoolie groups that you may be able to meet up and travel with. In fact, you can even set a goal to have so many skoolies in your group that you have to conduct school bus fleet maintenance to keep up!
Ok…But How?
Now that we know what a skoolie is and why they make great homes, let’s get into the technicality of things.
Buy it and Tear it Up
First, you may be wondering where you can even buy a school bus. You can find school buses at auctions for somewhere between $3,000 and $6,000. While this probably seems like a lot to some, it is normally cheaper than a used RV. As mentioned, school buses are made to last and they are made with the highest quality materials to keep traveling students safe, so in the end, this is not a bad price. You’ll be getting a vehicle with a sturdy frame and reliable parts - what more could you want in your future home? Other places to look are online classified sites, social media, school districts’ fleet yards, new school bus dealers, or a used school bus dealer. You’ll want to make sure the bus is in the condition you want it to be and it is normally a great idea to only purchase a bus with no or minimal rusting.
Once you have your bus, you will have to tear it apart. Ripping out the components of the school bus will allow you to see damage or other issues that need to be addressed before installing and designing anything. Basic exterior items that will need to be removed include the crossing arm, any words or decals on it, tape, and the stop sign. You will definitely want to keep an angle grinder nearby, as this will come in handy along with the rest of your basic tools.
The following major components will need to be dealt with:
- Seats: Of course, school buses have a lot of seats. While you might be tempted to use a wrench to loosen the nuts under the seats, it is actually best to cut the bolts slightly sideways to remove the seats.
- Wiring: Tinkering with wiring can make newbies nervous, so make sure to take your time when removing items that are wired. School buses typically have wired components such as lights and speakers, so if you don’t want to leave them in your skoolie, they’ll need to come out. Many of these can be removed and the wires can simply be capped with a wire nut. If you prefer, you can upgrade or switch out certain existing components, too. Be mindful, however, that wires may be connected to the school bus’s starting system, so continuously make sure you haven’t disconnected something important.
- Walls: Different school buses are made differently, so removing the walls in your bus could be tricky. Regardless if you are able to remove the walls with screwdrivers or have to use other tools such as drills, you will always want to remove the metal interior sliding and make sure it is in good condition, as this will allow for better insulation after completion.
- Ceilings: Similar to the walls, it is likely that your bus’s ceiling can be removed the same way you remove the walls. Note, however, that it is extremely important to inspect the insulation in the ceiling, and don’t skimp out if it needs to be replaced. Not having sufficient insulation can cause you temperature problems and other damage.
- Floors: Sorry to break it to you, but you can’t just put things on top of the original floor. Most school buses, especially those at auction, are older and the floors may not be suitable for living. Just as with the ceiling, you will want to make sure the floor has sufficient insulation, as this helps regulate temperature and also reduces the noise from the road. In general, school buses have a layer of rubber atop a layer of plywood. Both will need to be removed, but luckily the rubber isn’t hard to take out once you get a piece of it up (normally, it can be removed by hand after prying a piece up.) The plywood might be a little more difficult, as many various pieces are normally adhered to metal. Unless you’re the Hulk, you’ll probably need to utilize a pry bar or two.
- Heating: A school bus’s heating system is a bit more complex than other vehicles in that passenger heaters take coolant from the diesel engine and emit it throughout the passenger area. To deactivate the heating system, the coolant input and output will need to be joined with a simple hose barb fitting using clamps and a flat-head screwdriver. This can get a little tricky, as coolant can spill out, so it’s important to take extra care when carrying out this task.
Prepare for Remodel
Now that you have removed all of the things outlined above, you can prepare for remodeling. Since your bus will be relatively empty at this point, you can easily spot any trouble areas that might need to be resealed or replaced before doing further work. Paying close attention to any potential issues such as rust and corrosion can save you trouble in the long run. The following outline is good guidance on how to proceed from there.
- Floor: As we have mentioned, the floors of buses are quite thick and therefore make it easier to simply grind off rusted spots yet still have a sturdy foundation. Rust converters can be used on areas that are a little more problematic yet not quite to the point that they require patching. If you are not sure how problematic a rust spot is, simply poke it with your flat head screwdriver. If it slides through the floor, you should patch the hole up with new metal. Of course, you will also need to patch over the missing pieces where you removed the bolts under the seat. If you have some metal from the walls you took out, repurposing them for this should work just fine. Lay down plenty of caulk where you see gaps and small openings.
The floor should also always be cleaned before proceeding with any installations, and this can be done using a wire brush on your handy-dandy angle grinder, or simply a drill. You will want to make sure any dirt, grime, glue, or other substances are all scraped off and vacuumed. After you have cleaned everything and let the newly-installed metal and caulk sit for a day or so, you can paint the floor with a layer of oil-based paint.
- Ceiling, Walls, and Windows: You may find that you have similar rust issues on the ceiling, walls, and/or windows. If you do, use your nifty wire brush to remove the rust and then use a rust converter to clean it up. Before dealing with windows, you definitely want to check them for any types of leak. Simply pick up a garden hose and spray water at the windows. Any areas that need to be re-caulked will allow water in - if you find problem areas, it’s usually best to remove the old caulk and start fresh. Chuck the rubber gaskets on the ceiling for any deformations or deterioration, and re-caulk problem areas up top as well. Taking every precaution to prevent leaks in the future is critical to the longevity of your skoolie. Note that if the school bus you purchased was retired long ago, it may have loose, unsteady windows that need to be replaced. Even though replacing the windows will come at an additional cost, you could get bigger windows that give a better view.
- The roof: You definitely want your skoolie to have a roof that can handle rough weather, so it might be wise to take out the emergency exit hatches and install skylights instead. As with skylights on houses, these are extremely durable and can withstand harsh conditions including hail. Depending on how fancy you want to get, you may be able to install skylights with hinges that can open and close similar to a car’s sunroof.
Install the Floor and Insulation
While replacing all of the insulation may be time consuming, it is worth it in the long run. You want to replace older insulation prior to reinstalling the walls, the floor, and the ceiling. In general, your best bet is probably rigid foam insulation board. This is mainly beneficial when it comes to the floors, because your wooden floor can be installed directly atop it in contrast to some other insulation materials. As with most insulation jobs, you will want to cut pieces of the insulation and fit them within the wall cavities of your skoolie before using expanding foam to spread it out within the cavities. Different buses will differ in wall cavity thickness, but 1.5-inch insulation board should work fine.
The floor might be a little trickier, as you’ll need to run insulation board perpendicular to the sides of the bus. Finding how to cut and fit the insulation boards might require some math, but nonetheless they should fully cover the floor and be glued down with industrial strength construction adhesive. It is recommended you weigh the insulation boards down while the glue is drying.
While it might not be the cheapest option, sanded plywood is oftentimes your best option for the subfloor. More thickness is better, but of course, it will be pricier. Getting tongue-and-groove plywood can also make your life easier, as you can simply snap the pieces together instead of risking shifting parts. Of course, your subflooring will need some cutting and trimming to get the fit right, but once you have the proper pieces and sizes, you just have to secure it down with something sturdy like wood-to-metal screws. Finally, you just have to put the final layer of flooring, which could be vinyl, carpet, wood, or laminate.
Plumbing
Seeing as plumbing is one of the more difficult aspects to building your skoolie, we are going to give it its own section. You will want to figure out your plumbing system before reinstalling the walls and furnishing your new home. As with RVs, you definitely will need a system that can hold fresh potable water for drinking. Most RV owners typically feel comfortable carrying around 100 gallons of water, which can add hundreds of pounds to your skoolie. If possible, it is best to store this water in the underbody of your skoolie as opposed to on the roof.
The faucets will need to be connected with a pump to the freshwater tank. The pump size will depend on factors like the distance between each part and the desired gallons per minute. Water from sinks and showers will likely flow into a gray water tank in your skoolie, which you should try to fit in the underbody as well. Most skoolie owners prefer to have tanks that hold at least 50 gallons of liquid. To make things easier on yourself when cleaning out, use biodegradable shower products.
Many people opt to have drainage from the toilet go into a “black tank” that is smaller than the gray tank, but others opt for a “cassette” toilet that is portable and can be emptied in public bathrooms or a dump station hole in a park or campground.
Another critical aspect to the plumbing you’ll want to consider, of course, is fresh water filtration. You’ll either need to continuously purchase freshwater or you can invest in filtration systems. There are many different ways to remove toxins from water, so be sure to research them and find the one best for your budget and needs.
Remodel – Finally!
If you weren’t having fun yet, you will now. The next step is to design your skoolie and make the layout how you want it. You will need to take measurements of all kinds, including distance between the front and the back of the bus and the distance from the floor to the ceiling. Additional measurements to think about are the emergency exit doors and ceilings, the driver’s area, and the wheel hubs/protrusions.
How you prepare the layout is up to you. Whether you want to use tape throughout the bus floor or if you want to draw a blueprint, you ultimately need to make sure you measure everything well so that your items and appliances will fit where you want them. If you’re a techie, you may want to look into available computer tools that can draw out your future skoolie for you.
One thing you definitely want to leave room for is your bed, as you don’t want to have a bed that is too short or narrow. You will also want to try to save as much room as possible in the kitchen, meaning you may want to stack appliances or install high cabinets for storage of utensils and dishware. RVs in general do not have a lot of counter space, so you should plan wisely for this.
Along those same lines, your skoolie is literally your house. Therefore, all of your belongings need to fit in it. This can be difficult with such a small area to work with, but it’s not impossible. Installing cabinets in clever areas, purchasing storage bins for under the beds and sofas, and finding ways to condense items where possible are some good options if you are needing more room.
Depending on the construction of your skoolie, you may also be able to build some storage in the underbody. This can hold things you would typically put in a shed or utility closet and allows more room for other items in the main living space.
The roof and the exterior of your skoolie are just as important! You can paint them whatever colors you would like, or you can touch up the yellow paint should you want to keep it the same. Many skoolies have fun names like boats do, so if you have a clever name for yours, definitely display it on the exterior!
As added bonuses, you can install accessories such as a GPS system, a backup camera, and extra lights scattered around for when you’re traveling and staying in more rural, darker areas.
Licensing Information
A common question asked about skoolies is if someone needs a license to drive one. Of course, there is no license specifically for “skoolie drivers,” but check your local laws to see if you need a special license, such as a motorhome license. The title and registration process for the bus might be a little more of a hassle depending on where you live. This, too, varies in different areas, but generally you will have to remove certain things and add others to make your bus classified as a “motorhome.”
Don’t forget to sign up for insurance for your skoolie, too! Insurance companies do not have a special “skoolie” plan either, so check with your insurance company to see how yours would classify. Oftentimes, insurance companies may insure a skoolie as a pre-converted motorhome or similar designation.
Final Thoughts
Ultimately, if living in a school bus seems like your type of thing, it might be worth investing in. Since repurposed school buses are not subjected to school bus tracking systems like school district buses are today, you and your skoolie can get off the grid and venture out to the location of your choice whenever you want – that sounds fun to us!
